Enable network connectivity between Docker containers on CentOS 8
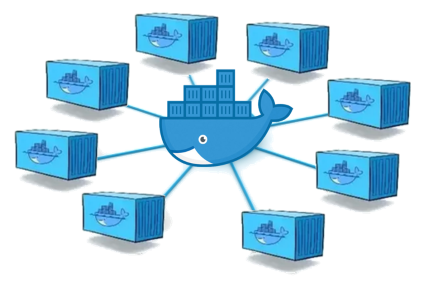
Enable a network connectivity between Docker containers on CentOS 8.
Reference
Prerequisites
Firewall setup
To enable network connectivity between Docker containers on CentOS 8, you have to enable masquerading.
IP masquerading is a process where one computer acts as an IP gateway for a network. All computers on the network send their IP packets through the gateway, which replaces the source IP address with its own address and then forwards it to the internet.
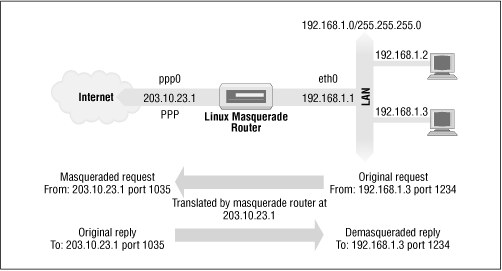
A gateway IP refers to a device on a network which sends local network traffic to other networks.
It looks like the docker daemon already did this through iptables, but apparently this needs to be specifically enabled for the firewall zone for iptables masquerading to work:
# Masquerading allows for docker ingress and egress
firewall-cmd --zone=public --add-masquerade --permanent

# Specifically allow incoming traffic on port 80 and 443
firewall-cmd --zone=public --add-port=80/tcp
firewall-cmd --zone=public --add-port=443/tcp

# Reload the firewall to apply permanent rules
firewall-cmd --reload
Restart dockerd, and both ingress and egress should work:
sudo systemctl restart docker
Test it
Test the network connectivity between Docker containers with a Wordpress and a MySQL container.
Docker Compose provides a way to orchestrate multiple containers to work together based on properties described in a docker-compose.yml file.
Edit a docker-compose.yml file with the following content:
version: '3.7'

volumes:
    mysql_data:
    wordpress_data:

services:

  database:
    image: mysql:5.7
    volumes:
      - mysql_data:/var/lib/mysql
    restart: always
    environment:
      MYSQL_ROOT_PASSWORD: mypassword
      MYSQL_DATABASE: wordpress
      MYSQL_USER: wordpressuser
      MYSQL_PASSWORD: wordpress
    expose:
      - "3306"

  wordpress:
    depends_on:
      - database
    image: wordpress:latest
    volumes:
      - wordpress_data:/var/www/html
    ports:
      - "8080:80"
    restart: always
    environment:
      WORDPRESS_DB_HOST: database:3306
      WORDPRESS_DB_USER: wordpressuser
      WORDPRESS_DB_PASSWORD: wordpress
From the directory where is your docker-compose.yml, start up your application by running:
docker-compose up
If you want to force containers recreation:
docker-compose up --force-recreate
In another terminal check that your containers are working:
export FORMAT="\nID\t\nIMAGE\t\nCOMMAND\t\nCREATED\t\nSTATUS\t\nPORTS\t\nNAMES\t\n"

docker ps --format $FORMAT
Your Wordpress website should be available at: http://localhost:8080
See also
date_range 02/09/2020
How to monitor SSIS job and package executions.
date_range 07/04/2020
Sphinx and GitHub provide an efficient and free way to publish your documentation online. Here we describe how to do so.
date_range 10/04/2019

The easiest way to install Python and Jupyter Notebook is probably with Anaconda.
Anaconda is a free and open source distribution of the Python programming language for data science and machine learning related applications, that aims to simplify package management and deployment. Package versions are managed by the package management system conda.